Friday, September 30, 2011

Mummy Card Tutorial

I made a bunch of these mummy cards last Halloween, and they were so quick and easy I thought it would be the perfect tutorial to share with you. Halloween is BIG at our house. Both kids love the holiday, and Charlotte was lucky enough to be born on Halloween night. The kids can't wait to decorate the house. But I have issues with decorating before October 1st. So I thought I'd distract them with some little mummy friends.

I'm sure there are a million different tutorials for similar cards. I've never looked, but it wouldn't surprise me. This is how I make them.


 Step 1: Gather the goods.

  • 1 colored card, A2 size (4.25" x 5.5") I just cut my own out of a larger piece of card stock
  • Flat white card stock (size 3.75" x 5") This is what you glue your mummy onto, then you glue the whole thing to the colored paper.
  • White paper strips (roughly 1" x 5-6") I just use scraps from old projects
  • 2 White circles (1.5" diameter)
  • 2 Black circles (1" diameter)
  • Extra colored card stock to match your folded card. You won't need much.
  • Glue. My favorite for paper crafts is zip dry
  • brown ink pad
  • scissors

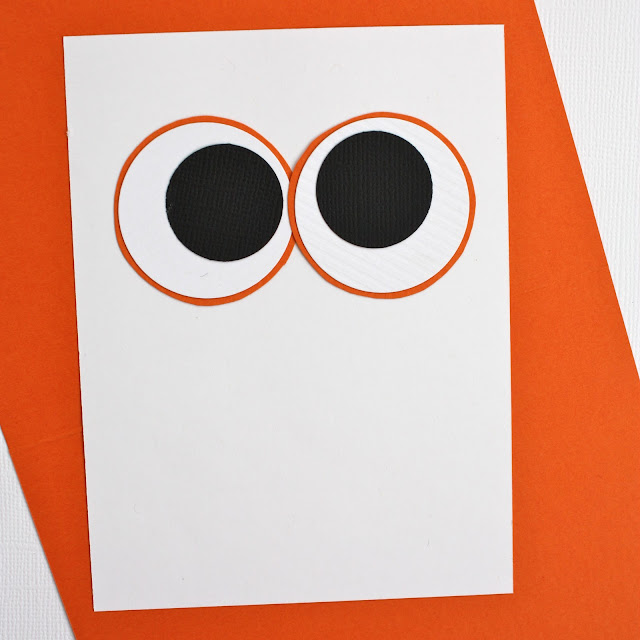
Step 2: Glue the black circles onto the white circles to make eyeballs
Step 3: Glue the eyeballs onto the scrap of colored card stock
Step 4: Cut around the colored paper. Leave just a small border. Doesn't have to be perfect. It just helps the eyes stand out from the bandages.

Step 5: Ink around three of the four sides of your paper strips. Or do all four sides, if you're feeling like an over-achiever. But the papers will be overlapping, so you can save yourself a little trouble here.


Step 6: Glue the eyeballs to the top third of the white card stock rectangle.


Step 7: Glue on one strip at a time to create the bandages. Don't get them too straight...you want them to be slightly angled. Also pay attention to where the inked parts are. You want to put them toward the inside of the card. You'll go around the entire outside of the card on the next step, to get anything that is left uninked.


Step 8: See how the edges aren't completely inked? I just mentioned that like two seconds ago. Just take your ink pad and rub it around the outside edges of the mummy.

 Step 9: Glue the mummy onto the colored card and you're done.

 Step 10: Unless, of course, your mummy is a girl. In which case, she'll likely need a hair bow.

I have to say, that this particular girl mummy looks an awful lot like Charlotte when she has to wear a hair bow. She kind of rolls her eyes at me like that...then tugs on it till it comes out.

Photobucket

Wednesday, September 28, 2011

Shop Update: Napkins

Finally, a mini shop update. Soon, I'll be adding some halloween goodies. So stay tuned. But for today, three new napkins. Well, they're old designs, just in spiffy new colors. :)


Hope you're having a good week!

Photobucket

Monday, September 26, 2011

MIA


I've been a little MIA lately. I don't really even have a good reason. Except that I've kind of reached that point in my pregnancy where I become really mean and nasty. My mom is the lucky one who gets to hear my daily rants about people who bug me. Thanks, Mom.

And I've been slammed with orders lately. That's normally a good thing, but lately I've been working with some really intense people who have a hard time understanding that making paper goods isn't my full-time job. I've considered closing up my shop for a little while, just to take a breather. I think I've decided against that for now.

Ready for me to stop complaining? I recently got into canning, and I've been busy with 25 pints of jam and some dilly beans. What? Never had a dilly bean before? You're really missing out. I'd offer to share, but you'll have to go through Bryce to get to them, and I doubt he's really willing to part with a single bean. Also on the bright side, I finally reclaimed my kitchen after a week or two of heavy-duty cooking.

I took the picture above on a rare family outing a few weeks back. It's the first time all four of us went out of town in over a year. So despite a few mishaps and a bee sting (that really didn't help Hudson's phobia of bees), we had a great time.

I've got some really fun Halloween activities planned and nearly ready to share with you. So hold tight and I'll be back when I'm in a presentable mood with something fun to share. :)

Photobucket

Friday, September 16, 2011

In the Studio: Stripes


Just a couple of the business cards I've sent out recently. Apparently I have a thing for stripes these days. I recently ran out of my self-printed business cards, and thought a re-design was in order. So here's what I came up with:


I also changed my blog and my shop to reflect my current look. Bryce's response to my new business cards: "So, you're a graphic designer now, huh?" Thanks, Honey. After I design your first business cards, remind me to say, "So you're a surgeon now, huh?" You'll love it.

Honestly, I don't really know what I am. I do know that design jobs are what take up the bulk of my work time these days. Whether it's business cards, wedding packages, roadside banners, party invites, etc. I'm designing things for people. And graphic designer sounds a little bit better than I make stuff, or I'm not exactly sure what it is that I do. Those were the other two titles I threw around. :)

Can't believe it's Friday again. What are your plans for the weekend? I'm here with the kids while B is at a conference. I think I'd rather be stuck at home with these little rascals than sitting in a conference room looking at slides of blood and guts. But that's just me. Today I'm helping in Kindergarten...it's puppet-making day. And you know how tricky those glue sticks can be. Then I'm dragging the kids off to GemFaire to grab a few sparkly bits for some jewelry customers. Soccer, some canning and a cardboard box car/drive-in-movie will round out the weekend.

Have a good one!
Photobucket

Wednesday, September 14, 2011

It's A.....

...BOY!!!


We're all SO excited. I can't believe my pregnancy is half-over. I'm officially twenty weeks now, and I've been so busy with the other two kids, my work and life in general, that I haven't really had time to think about being pregnant.

The only reminder of my pregnancy is that I'm constantly tugging at my pants. It's a really annoying problem. Whether I'm wearing maternity pants or regular pants, the only direction they want to move is down. Probably has something to do with the basketball-shaped bulge resting on them. So I pretty much give up the tug-of-war around 4 every afternoon and put on my sweats. The only pants that don't give me troubles are my Splendid leggings. Love them. I'll formally introduce you to them next month.

I had my suspicions early on that I was having a boy. Headaches, bad skin, and heartburn have been my constant companions these last five months. I didn't have those symptoms during my pregnancy with Charlotte, but I did with Hudson. Although, I guessed wrong both times before, so I kind of psyched myself out at that last minute and convinced myself it was a girl. So I was still surprised to hear the news. Needless to say, I think a little boy will be the perfect addition to this family.

A couple notes:
*A HUGE thank you to Ashley for her beautiful work. And for fitting me into your busy schedule. And for being my friend. xo.

Shopping Guide:
Shirt, Old Navy (similar) {yes, Jill, I totally bought this because of you}
Tank, Splendid Maternity
Jeans, Jolt Skinny Jeans (similar)
Boots, Steve Madden (similar)
Necklace, DIY (check out my tutorial here).

Hope you're having a great week!
Photobucket

Friday, September 9, 2011

Easy Canvas Prints


I've seen so many great canvas pictures lately, so I jumped for joy when the nice people at Easy Canvas Prints contacted me about doing a product review for a canvas picture of my very own. I had such a hard time deciding what to have printed on the canvas. And in the end, I decided I wanted to do something a little different than a photo. I finally decided on putting the image from last year's Christmas card on the canvas.
I have to say, I really loved my experience with Easy Canvas Prints. Their website is clean, simple and SO easy to use; it takes you step-by-step through designing the perfect canvas for your needs. And it shows the updated pricing as you go, so there are no surprises in the end. They had such a quick turnaround and were very responsive to my questions. The image I received is exactly the image I uploaded...and the colors matched so well. Sometimes you never know what you'll get with the difference between computer screens/printers, etc. But I'm thrilled with the results.
And getting my new canvas prompted an overhaul of my gallery wall. I've still got one little bare spot where I'm planning on putting a little needlepoint artwork when I get it finished. Oh, and I apologize for the sub-par, shadowy photos. My couch is in a spot that only gets good light for a few minutes. And I just happened to be stuck in the tire shop with a flat during those few minutes. And I swear the frames are actually straight in person...my photography skills are severely lacking today.

Have a great weekend!


A Quick Note: While Easy Canvas Prints did provide me with a free canvas, they did not make me say nice things about them. This is my honest-to-goodness opinion on my experience with them. My experience was really so great that I'm planning my next purchase from them as we speak.

Photobucket

Thursday, September 8, 2011

Yarn-Wrapped Letters


Sorry for my little unexpected absence. I had no idea kindergarten would throw my routine into such an upheaval. I'm starting to feel like all I do is run back and forth between home and the school. But here's a little project I squeezed in last week. These yarn-wrapped letters are so quick and easy, and I think they'd make great baby gifts. In fact, I made this one for my new niece, Audrey.


 Step One: Grab your supplies...

Start wrapping the closed-off areas of the letter. You'll have to take a length of yarn and cut it from the skien, so you can wrap through the opening of the letter. Secure the ends of the yarn with hot glue and keep wrapping till the area is covered.


Step Two: Pick another spot and keep wrapping. The open "legs" of the letters are super easy, because you can leave the yarn attached to the skien and just wrap like crazy. The main purpose of this layer is to make sure the side-parts of the letter are fully covered.

Step Three: Keep wrapping. I had a few bald spots, so I cut little pieces of yarn and glued them into those areas. I knew I'd be wrapping another layer, so I didn't stress too much about it being totally perfect.

Step Four: Keep adding layers until you like it. The first one I made, I didn't like at all, so I simply cut the yarn off and started over. Also, the thicker the yarn, the quicker the coverage. I finished it off by cutting a little flower out of felt and gluing it onto the leg. Ta-Da! Quick, inexpensive, custom decoration!


 P.S. Isn't my little photo assistant such a good little helper?


I'll be back tomorrow with a fun canvas project I've been working on, and the re-design of my gallery wall. And I've got some really fun baby news coming up soon, too! Have a great day.

Photobucket

Thursday, September 1, 2011

Paper Flowers


You remember WAY back when I told you about Katherine's 52 smiles project?
I've been absolutely horrific at documenting our projects. But we've had so much fun thinking of ways to make people smile. We're sharing one of our favorites over on good tots today.

Photobucket