
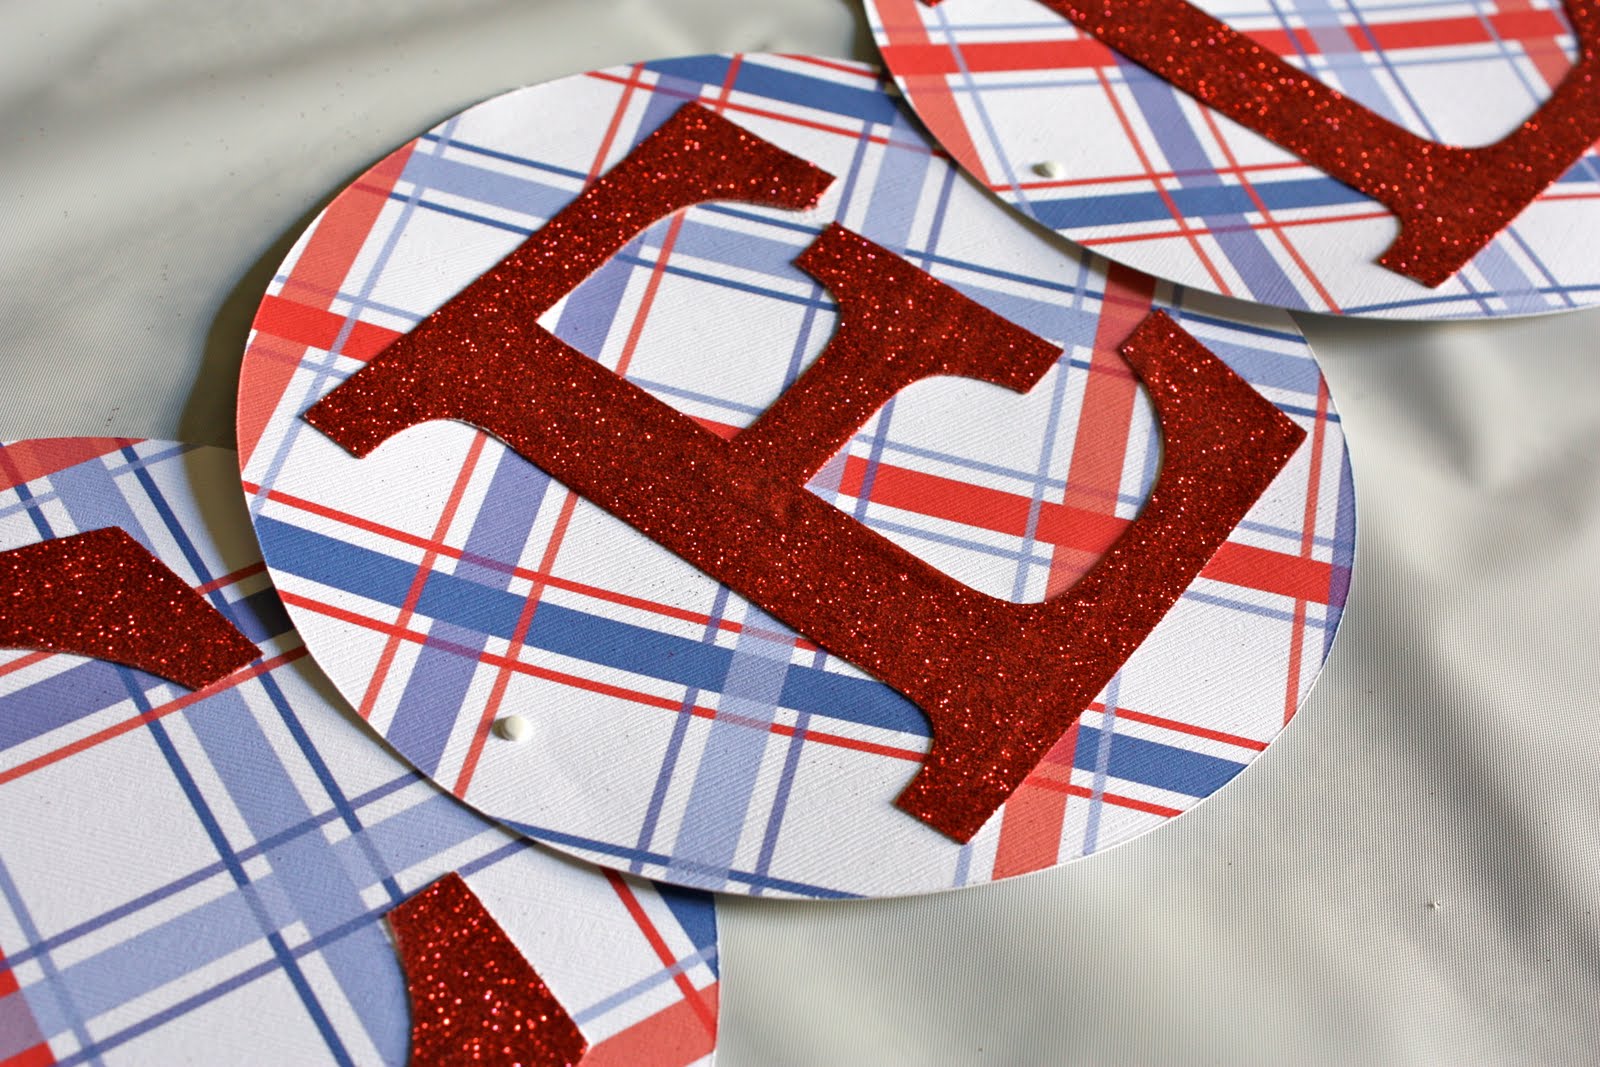
 If you remember last month, I mentioned a Fourth of July project I was working on. I made these huge Celebrate banners for a window display. The main challenge was coming up with something that wouldn't fade in the sun. I printed a pattern on white card stock; because the ink won't fade as badly as will plain colored card stock. And for that same reason, I covered the letters in glitter...so they'll stay shiny and new-looking the entire time.
I know party banners of this sort are a dime a dozen. And they're pretty self-explanatory; but I also used this project as my newsletter article for the month, so I may as well get a blog post out of it. (I think I forgot to mention that I write for a local mother's club newsletter?)

Heres's a rough list of supplies:
(Note: quantities for this project will vary depending on the size and number of letters in your particular banner).
- Patterned paper
- Plain card stock, or printer paper
- Glitter (optional)
- Mod Podge (or another spreadable adhesive)
- Foam brush
- Spray glue
- Brads, ribbon, eyelets (or any other type of fasteners)
Let's get started:
1. Decide on what you want your banner to say. Mine says a generic, "Celebrate." Anything works...names, holiday phrases; or the ever-popular "Happy Birthday."
2. Cut out the letters used to spell your phrase. (I used my Cricut). You can also use a stencil, or just print them out and cut around them.
3. Cut circles out of the patterned paper large enough to go around your letters. You can trace around a cereal bowl, a glass, or use a circle cutter, punch, etc.
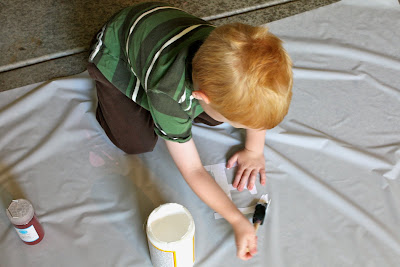
4. If you're using glitter: Using your foam brush, coat each letter with Mod Podge, then cover with glitter. Shake off the excess glitter and allow to dry completely.
5. Use spray glue to adhere each letter to a circle.
6. Fasten the circles to each other using brads, ribbon, eyelets, etc.
7. Hang up your new banner and let the party begin.

A few helpful hints:
- I keep a roll of plastic table covering on hand for parties. It also works as a perfect floor covering when working with glitter and spray adhesive. I rolled out two sections: the first one for the glittering/gluing process; and the second to keep the finished letters clean while drying.
- If you're using glitter: definitely use a heavier paper for the lettering. It will stand up better to the moisture in the glue.
- If you use Mod Podge as a base for the glitter, try to brush it on as evenly as possible. If there are huge ridges, the letters will look a bit wonky.
- Get creative. Use a combination of different patterned papers, or different fonts for the letters. Anything goes.
Happy July, folks! Now get out there and party.
6 comments:
It turned out great! You are so brave to let Hudson help you with the glitter!! What a good mom. I want to see the window display!!
Happy July to you too
and yeah show us the window!
So DARLING! I hope your 4th is GREAT!!!! xoxoxoxoxox
Very cute - happy 4th!
Adorable! I'm hoping to finish up one of my long-awaited diy projects this weekend! Hope you guys have a sizzling fourth of july & that all is well with you!
xo Mary Jo
Have a great holiday weekend
Post a Comment